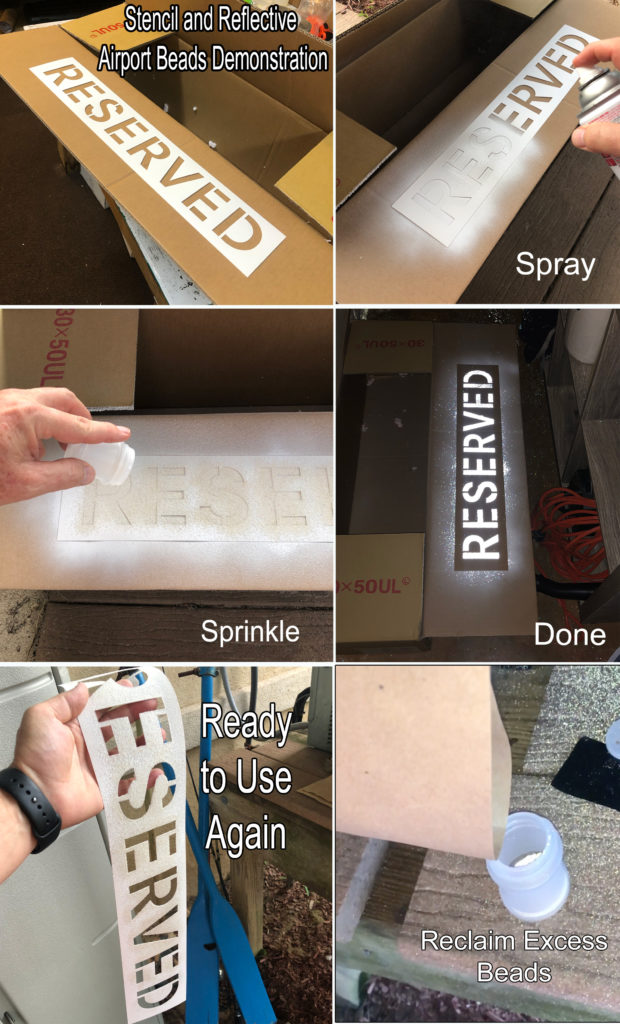
Reflective Airport Beads can be applied in a couple of ways. The most popular method is to first apply a coat of paint, then while it is wet, cover the top of the paint with a layer of beads. Once the paint dries you can recover the excess beads back into your container. The lighter the paint you use, the brighter the reflectivity will be. A white or silver is optimal. Our shaker bottles work very well for this purpose. We have small and large shaker containers. You can also buy our beads in bags to refill your shakers.
In the example above, we used a plastic computer cut stencil that is reusable. Since this was just a demo, we did not mask around the edges of the stencil, however, normally you would. This way, only the letters would be reflective . As you can see, the white spray paint makes an excellent background for the bright airport beads and returns a maximum amount of light.
Another way to apply airport beads is by mixing them into a clear base. If you do it this way it is imperative that you use only a thin coat. The reason for this is that the tops of the beads need to be exposed in order to capture light. It is easy to mix this product with clear and paint, just remember to brush down the coat until the beads are exposed. This method would be optimal for odd shaped objects or surfaces that are not horizontal. A thin coat of clear coat mixed with beads could easily be applied to a vertical surface. As long as the coat was thin, it would light up very nicely. The beauty of this product is that if you put it on too thick and did not get the reflectivity you desired, you can just put another thin coat on top and this should solve the problem.